
The death knell of VMware seems poised to ring in a new era for Proxmox. With its ease of use and popularity for home labs, it can be tough to find enterprise-class deployment examples among the extensive how-to guides and tutorial videos.
Not every company can dedicate its engineering resources to a full deep dive on VMware alternatives, let alone repurpose or acquire hardware just to test and reskill on a new virtualization platform.
At HorizonIQ, we migrated our infrastructure from VMware to Proxmox. A footprint of 300 VMs, using just under 800 vCPU and 10 TB of RAM, backed by 90 TB of redundant Ceph storage and 225 TB of flash storage for performance-critical workloads.
We put in the time on our end so you can save it on yours. This post offers a quick tour of a high-availability Proxmox environment on server-grade hardware, viewed through a familiar VMware lens.
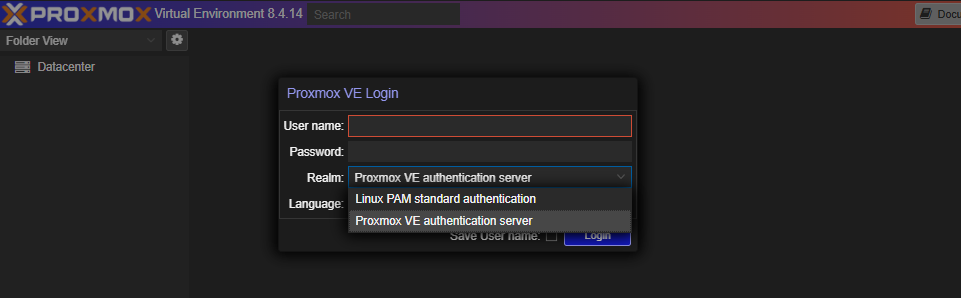
Logging In and Authentication
When clustered, every Proxmox node serves up a GUI on port 8006, roughly analogous to vCenter for cluster management.
We use a load balancer here for simplicity in our demo environment.
You can log in with:
- A local user (same as SSH credentials)
- Or with Proxmox VE authentication (accounts created within Proxmox)
Login Screen
After login, you may see a subscription notification if your environment isn’t licensed for enterprise support.
Our production environments are fully subscribed, so this screen doesn’t appear outside of demos.
Subscription Notice

Navigating the Interface
The interface is intuitive, with views accessible from the top left.
Available Views
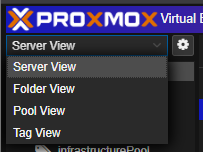
- Server View: Similar to vCenter’s inventory view if each node were standalone, though they function as a true cluster.
- Folder View: Groups objects by type.
- Pool View: Lets you organize and assign permissions.
Datacenter Overview
Clicking the Datacenter object provides configuration options for the entire cluster.
Summary Page
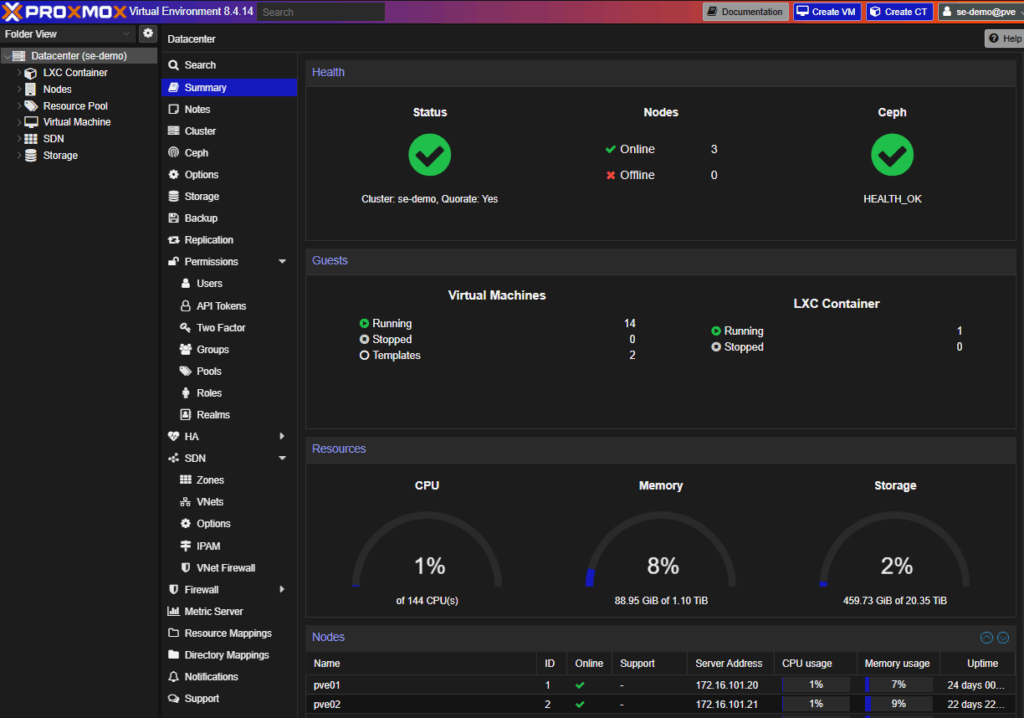
From here you can:
- Monitor cluster health and usage
- Manage permissions and authentication
- Add and configure storage
- Configure high availability (HA) and software-defined networking (SDN)
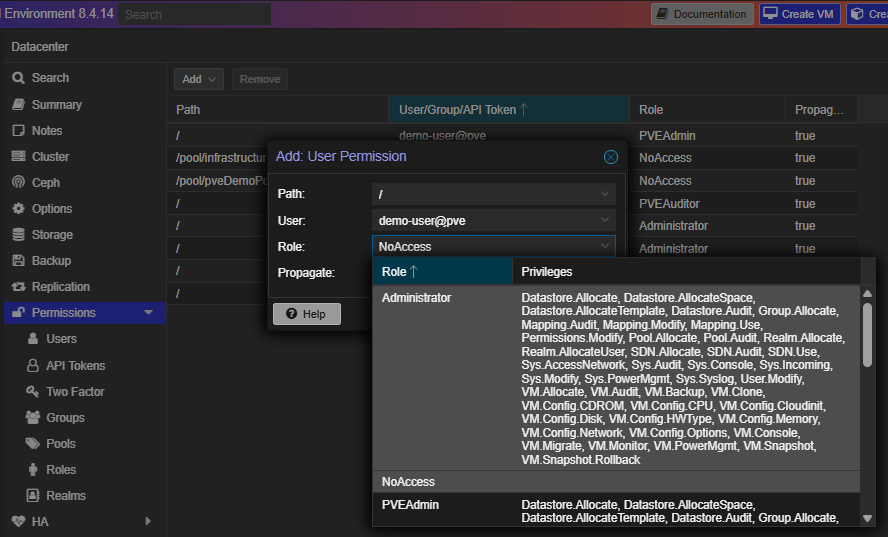
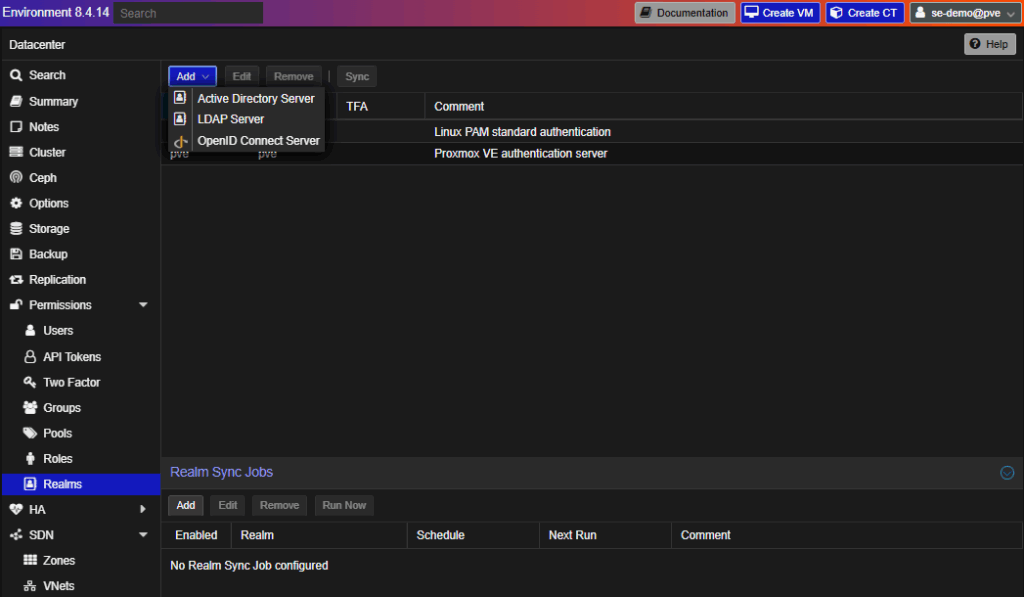
Permissions and Authentication
User management mirrors vCenter’s role-based access control, with additional granularity.
Add User

Add Permissions
Authentication realms include LDAP, local, or Proxmox-native systems.
Realms Options
Storage Configuration
Under Storage, you can define what content types are permissible by storage class.
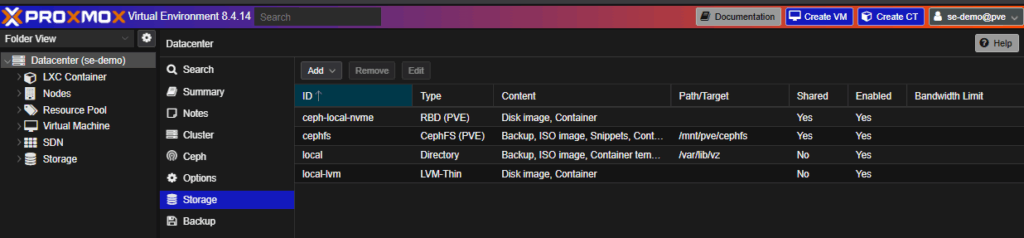
- Our standard deployment uses Ceph clustering across drives on each node, exposed as RBD (for VMs) and CephFS (for ISOs/object data).
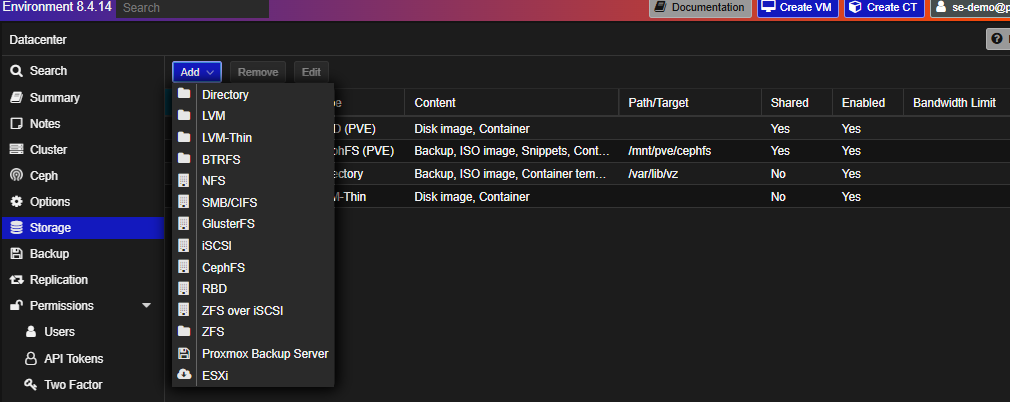
- Externally hosted Ceph storage is another good, natively supported option
- Odds are you will want to know the options for SAN storage connectivity since that’s traditionally been easier to implement than vSAN hyperconverged storage in VMware.
- NFS is our recommended option for attaching SAN storage
- iSCSI is supported but limited. We generally discourage it for production for highly available workloads.
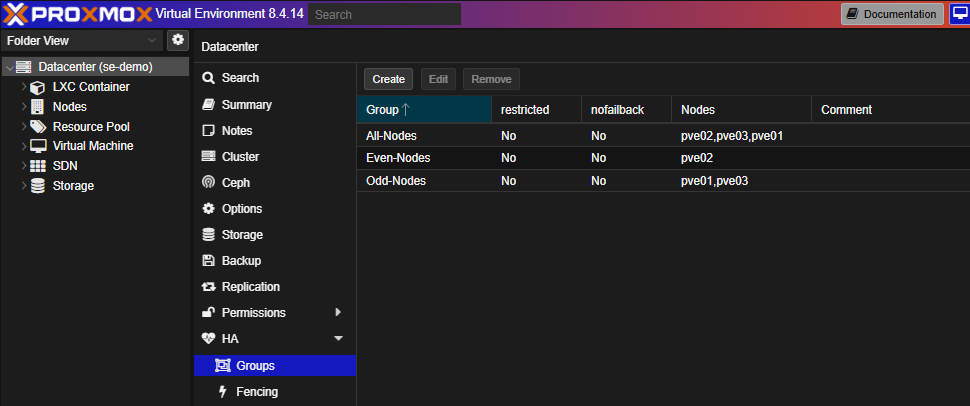
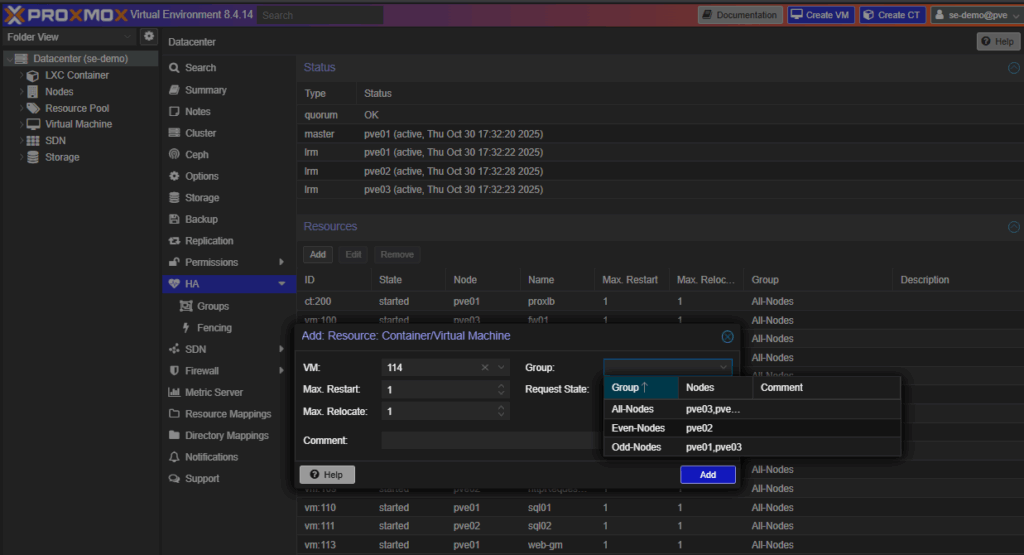
High Availability (HA)
VMs aren’t HA-enabled by default. This section lets you assign them for protection in case of a node failure.
HA Groups
Add VM to HA
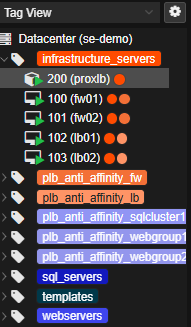
By default, Proxmox lacks vCenter-style affinity/anti-affinity rules and DRS-style balancing. We augment that using ProxLB, an open-source add-on providing:
- DRS-like load redistribution
- Proper affinity/anti-affinity functionality, facilitated through Tags
ProxLB Tag View
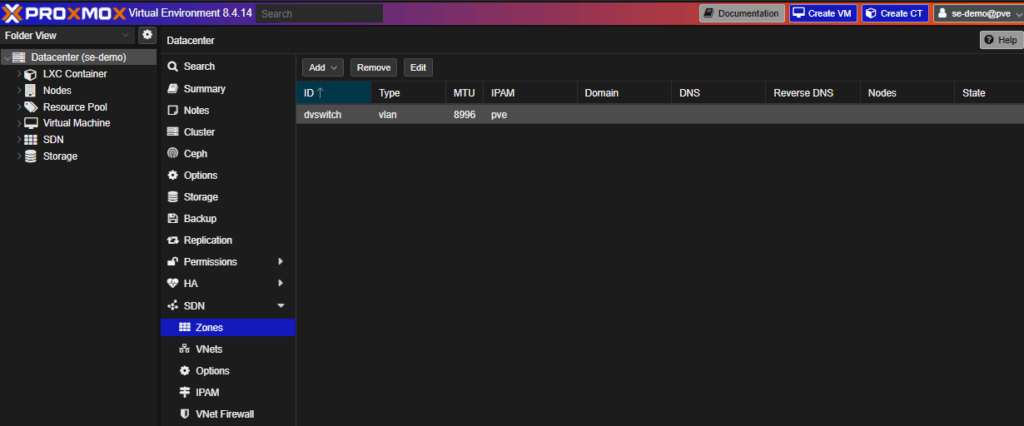
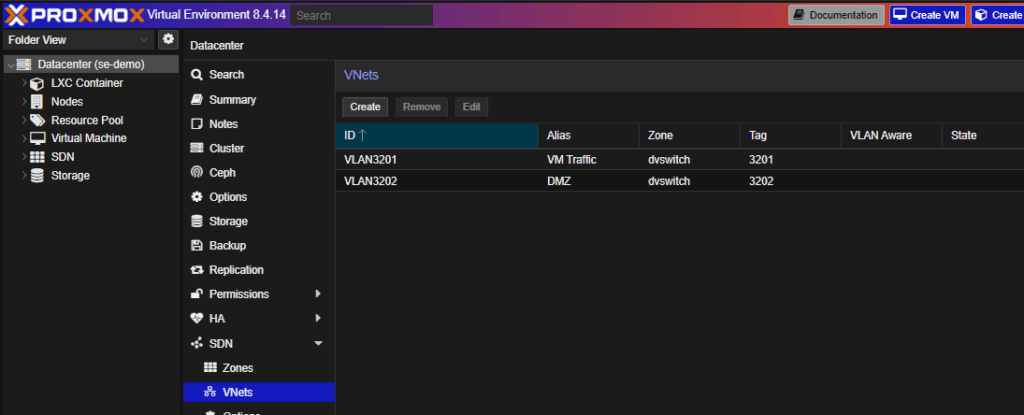
Software-Defined Networking (SDN)
The SDN module replaces VMware’s vDS and port groups.
- Zones = Virtual Distributed Switches
- VNets = Portgroups
We rely on VLANs and firewall appliances for segmentation in our datacenter, so the isolation and firewall options within the SDN section aren’t as relevant for most deployments.
SDN Overview
SDN VNets
Looking to migrate without overlap costs?
Migration shouldn’t drain your budget. With HorizonIQ’s 2 Months Free, you can move workloads, skip the overlap bills, and gain extra time to switch providers without double paying.
Get 2 Months FreeNode and VM Management
Each Node represents a hypervisor.
Node Summary
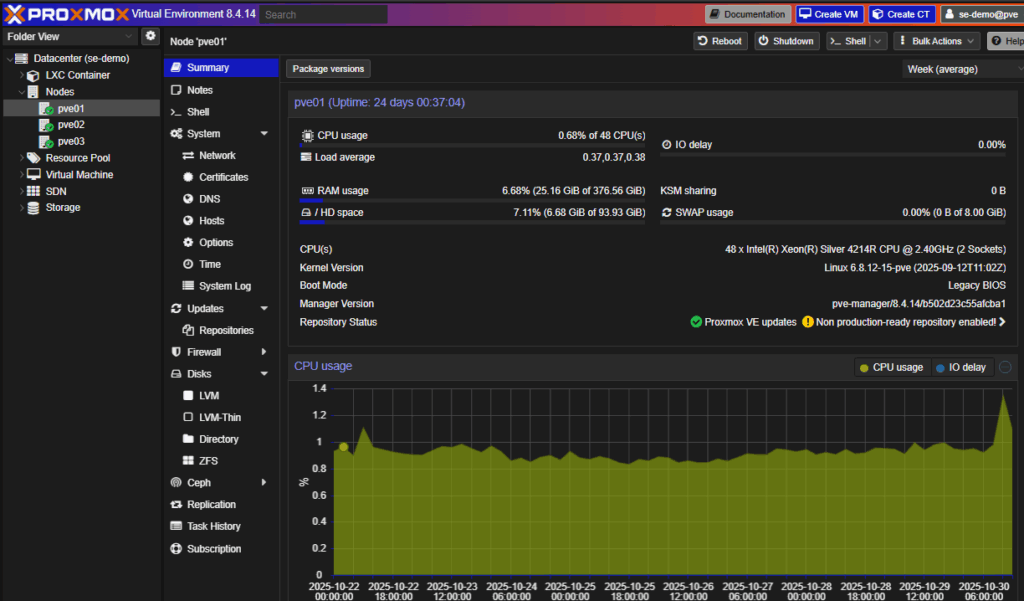
This page mirrors what you’d expect in vCenter:
- Resource usage
- Configuration panels
As an added bonus, there’s web access to the shell (no SSH needed)
VM List

VM Summary
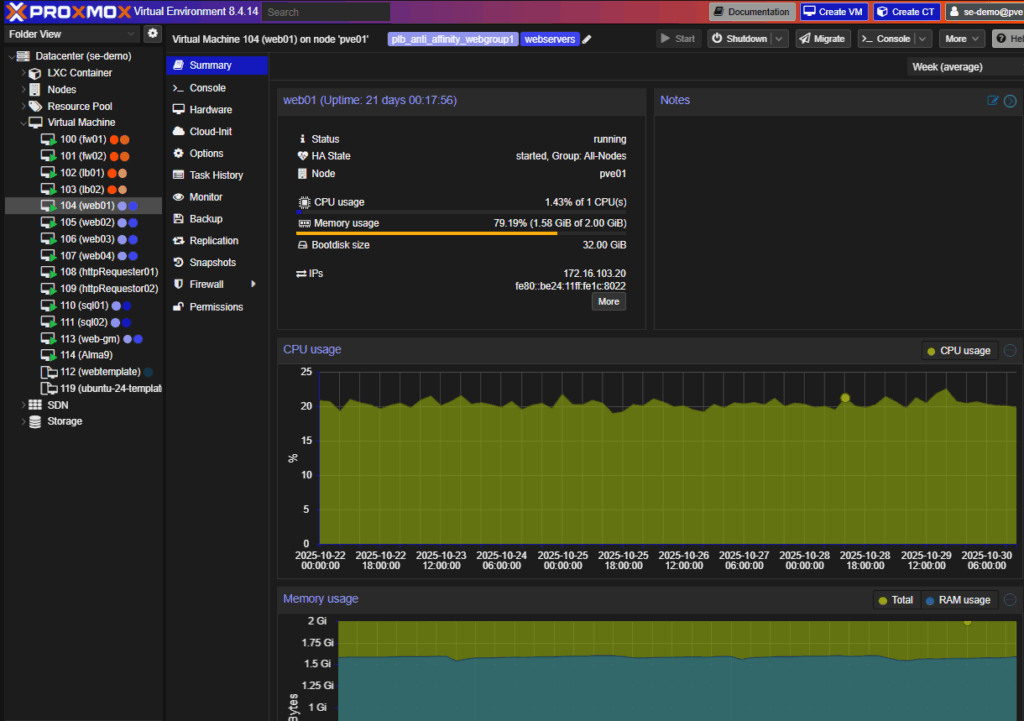
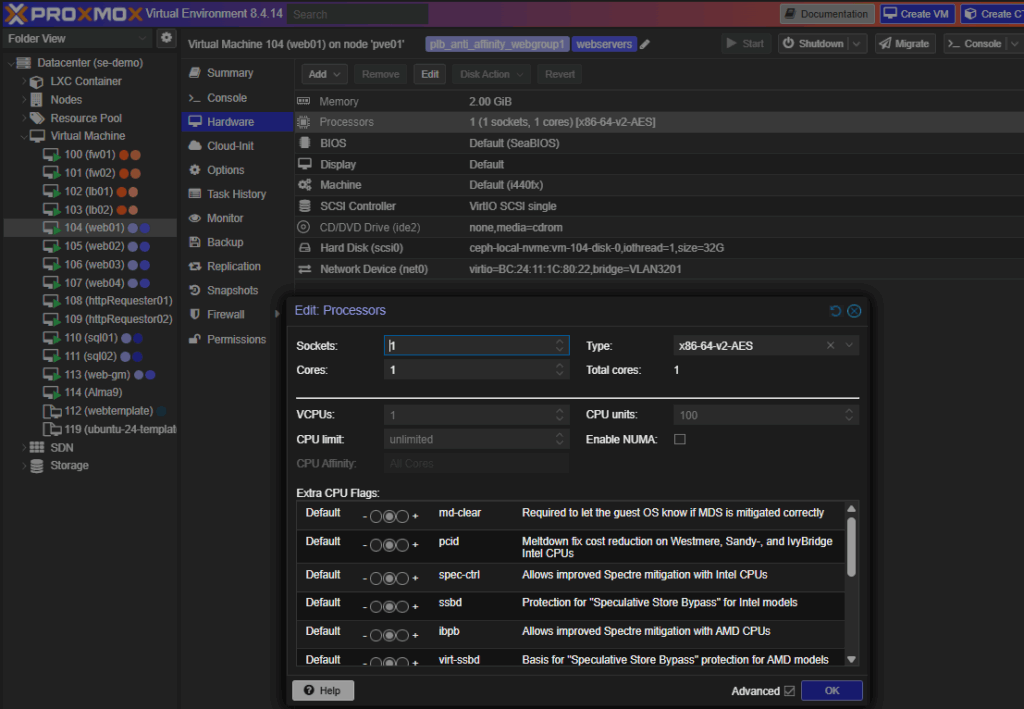
Proxmox supports console access, QEMU agent integration, and hardware hot-plugging for CPU and RAM (OS-dependent).
Edit CPU Live
Creating a Virtual Machine
VM creation in Proxmox mirrors vCenter’s workflow, with a few additional options.
- Choose a resource pool
- Add tags
- Mount an ISO for manual install
- Choose the virtual hardware and network details
Below are the key screens in order:
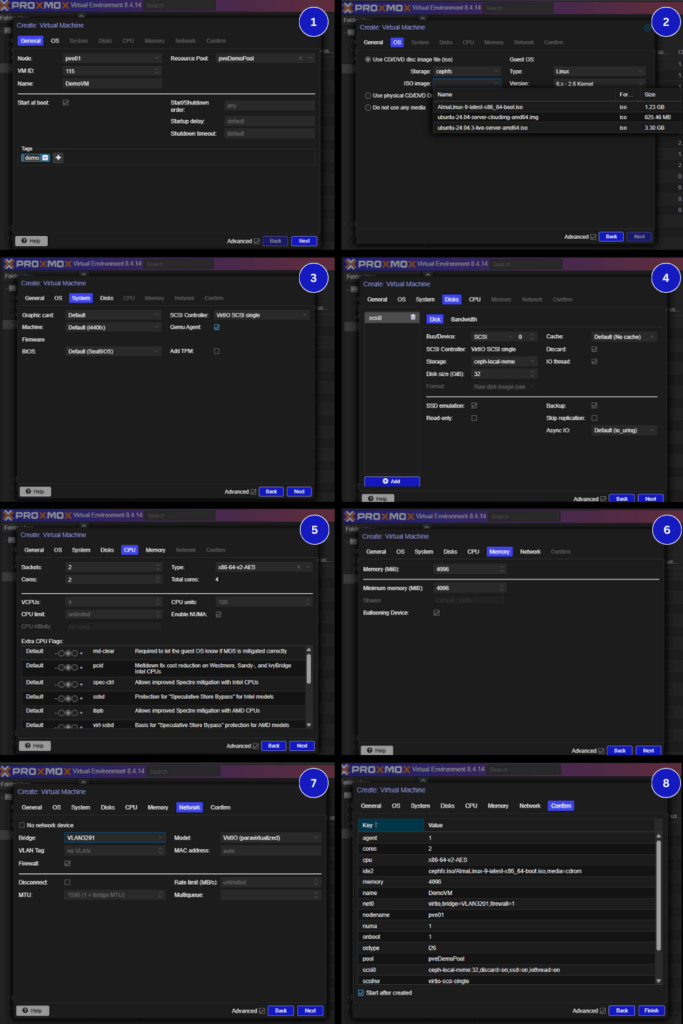
You can add multiple drives during creation, but extra NICs or devices must be added post-wizard.
Live Migration
From Server View, the Migrate function works like vMotion when shared storage exists in the cluster.
Replication-based migration is also possible without shared storage, though for enterprise environments, we focus on ensuring there’s stable shared storage available.
Discover an Enterprise-Grade Proxmox Environment with HorizonIQ
Proxmox is far more than a homelab tool. At HorizonIQ, we build and host fully managed Proxmox-based Private Clouds, complete with:
- Enterprise HA clustering
- Ceph-backed storage
- Predictable, flat-rate pricing
- 24×7 managed infrastructure
If you’re ready to escape Broadcom’s licensing squeeze without spending months learning Proxmox internals, we’ll handle the infrastructure layer so you can focus on your VMs and applications.
We even provide pre-built trial environments at no cost, so you can experience enterprise Proxmox firsthand before making the switch.